I’ve been honing my skills in audio creation over the last few years as many would agree that high quality is much more important than high quality video. I have put together five things worth considering when it comes to narrating and recording online content.
I do want to make this very clear that I am not an audio engineer. These are just tips that I have to share with instructional design in mind, after a lot of trial and error.
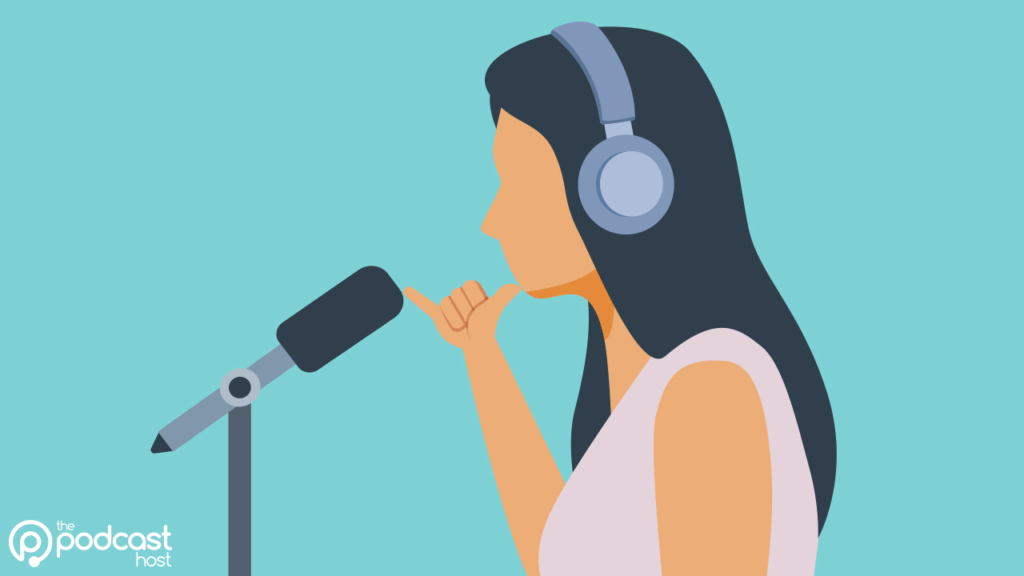
Select the correct microphone for the environment
Microphone type
The first thing to do is determine what type of microphone are you going to use before doing any audio creation. There are three common types of microphones that you can pick from. They are:
- Condenser microphones.
- Dynamic microphones.
- Ribbon microphones.
Condenser microphones are really sensitive and can capture lots of details and nuances. This makes it really good for dramatic vocal performances as well as recording instruments.
Due to them being sensitive, they should only be used in a studio environment which has good acoustical properties like dampened walls and floors.
Ribbon Microphones are similar to condensers as they are very sensitive but they capture the most natural sound. Like condenser microphones, it’s important to use these in studio environments. These microphones are so sensitive that you can even damage them from air blasts, so you have to be careful.
The third type is a dynamic microphone. You’ll usually see these in live music concerts because they pick up less of the background and they are usually pretty robust. Having a non-studio environment is a lot less forgiving because they aren’t as sensitive and pick up less noise. One thing to consider is that they won’t pick up as much of a dynamic range of sound when compared to the previous two types of microphones.
Polar Patterns
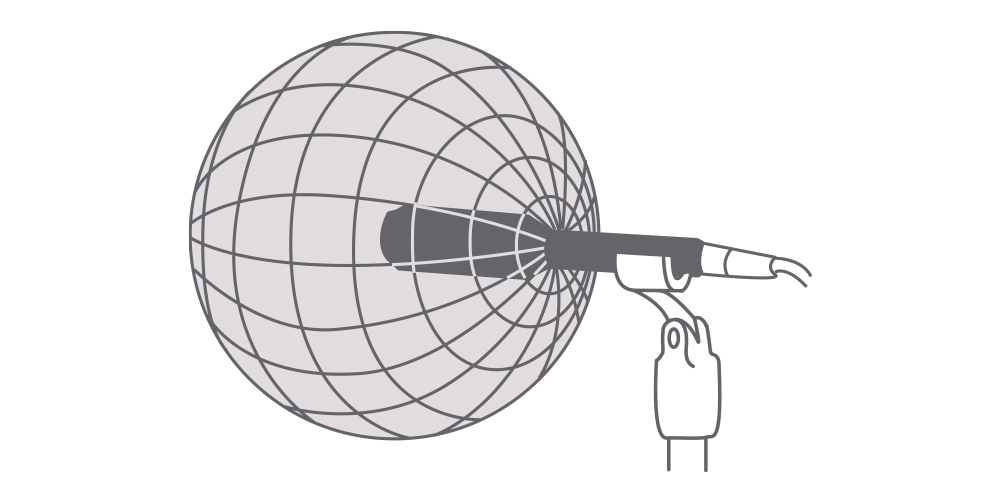
The type of microphone is not the complete picture. You also have polar patterns which is important to audio creation, which is basically how the microphone picks up the sound waves that hit the microphone. There are several types.
Cardioid patterns pick up sound from directly in front of the microphone which is also known as an omnidirectional pattern. This is good if you are recording just one subject and you want some noise reduction from the room around you.
Omni-directional patterns, pick up sound from a 360 degree angle which will typically give you a more natural sound. But this will result in more noise in your recording, especially if you record in a non-studio environment. This can be useful when recording in stereo or recording two different instruments. Maybe even an interview-like podcast.
Figure 8 patterns are like a mixture of the two patterns above, as they pick up sound from the front and back of the microphone but reject sound from the sides. This type of pattern would be even better for a two-person podcast.
Shotgun patterns are “very directional”, meaning you can only capture sound from the front and very minimal sound from the sides and back. You can also typically capture from further away. You will most likely have seen a shotgun microphone where there are film and news cameras. These are the microphones you see people holding with a long pole!
You can read more about polar patterns from this article by Audio Technica (Opens in a new tab).
So, you may be wondering, what do I use? When recording at home, I use a dynamic microphone, using a cardioid pattern because I don’t have a perfect recording space and I want to record a single speaker in front of the microphone. Currently, I use a Shure MV7 as it’s very affordable and has both USB and XLR options.
Your Environment
I’ve mentioned that you should consider the type of microphone based on your environment, well let’s talk about your environment in your audio creation.
Microphones will literally record the sound that you are making, but the sound will literally sound different in different environments. If you record in a large room, you will notice sound bouncing off the room, which is commonly known as a reverb. Record in a smaller room and the soundwaves will dampen, resulting in less reverb.
But it’s not just the size of your environment, also consider what is in your room. If your room is empty, there are fewer things for soundwaves to hit, which creates more reverb. If you have lots of objects in your room, it will dampen even further.
And then there are your walls and floors. You’ve probably seen a recording studio on TV where all the rooms are covered in foam and the floor may have special acoustic flooring. I’m not an expert on this subject but you want to aim for a 50/50 treated and untreated space because you don’t want reverb but you also don’t want to kill the soundwaves completely. Each environment is different, so take this with a pinch of salt and experiment with what sounds best.
The next important aspect of your environment is: what else do you have that is emitting sound? Do you have a computer? A light on? Air conditioning running? I have a dimmable smart bulb which hums a frequency when you have it too bright. I also use a computer to record my audio. These are things you need to consider with your environment. Electrical items tend to pickup very easily on a microphone.
What can you do to improve your environment? Consider recording in a small room. Make sure the room is well furnished, if you clap your hands and hear a noticeable echo then you may need to dampen the room a bit. You could try to hang curtains or blankets on the walls to help, preferably in front of you to dampen the sound coming from you. Make sure if you are using a computer or laptop, that the fans aren’t running loud. This is especially important for laptops which tend to run louder than desktop PCs.
Noise Floor

So you have picked out a microphone and got your environment sorted. Let’s talk about the noise floor. You will need to know how to record audio. This post isn’t a tutorial on how to record audio. But just so you know, I record narration in mono, 48khz and 24bit. I also use Adobe Audition, but you can use any DAW (Digital Audio Workstation) that you want.
You will want to hit record but not do any narration. Here you are just recording the ambience of the room which is called the noise floor. You want the noise floor to be as quiet as possible. You may notice the sounds outside the room or the computer that you have on, etc.
After doing this, you can start to record your voice while keeping it at an acceptable level. If you have to turn your gain up, your noise floor will increase. You want to get a good balance of minimal noise and a good volume of your subject.
If you record 5-10 seconds at the start and end of a session you can use that as a last resort to run a noise removal process on your audio. But I prefer to use something like a noise gate instead.
Microphone Distances
A common issue I hear when working with remote teachers, is that they don’t have their microphones at the correct position. Typically they are recording video tutorials and have their microphone way off to the side, out of the way. But this is not a good thing to do because you need to have the microphone in front of you and ideally 6 inches away from your mouth (this one really depends on the microphone). Having a microphone far away also means you have to turn the gain up which means… a louder noise floor.
Having the microphone too close can have a very interesting effect which is known as the proximity effect. Be careful when doing this as you can get a lot more plosive sounds. A plosive sound is a puff of air that hits the microphone. You can combat this distortion by using a pop filter in front of the microphone.
So make sure your microphone is in front of you according to the polar pattern of your microphone and that it’s not too close and not too far away.
Quickfire Tips
My last audio creation tip is going to be a few additional tips.
Headphones
You should be listening back to your audio with a decent pair of headphones. Ideally, closed-back headphones that don’t emit noise when playing back your recording. Monitoring your audio is another term used when you are listening to your microphone in real-time. This can take a bit of getting used to as you may not like the sound of your own voice. But doing this can help you tell if you are recording too loud or too quietly.
Recording levels
You should be looking at your recording levels while recording to ensure you’re not recording too high or too low. Ideally, you should not be going over between -6 to -3 decibels. And if you are hitting 0db, then you are peaking, which will give you badly distorted audio.
Post-Processing
I typically use an Equaliser, Noise Gate and Compressor to post-process my audio. Don’t use presets for different narrators, as everyone has a different voice. Make sure your final volume is at a decent loudness. You can set the loudness of your audio to something like the ITU 1770 standard to ensure it matches the same loudness of other online media.
Format
This should be straightforward, but always save your audio in the WAV format, which will keep your audio lossless. If you are importing audio into Storyline, iSpring, etc, it will compress it into an MP3 or similar format. You don’t want to save as MP3, only for it to compress a second time.
Audio interfaces
You may want to use an audio interface to connect your audio gear. You will absolutely need one if you choose an XLR microphone. Sometimes a USB or 3.5mm microphone can get some noise distortion from computers. The Scarlett Solo is a popular choice. You can also plug an instrument into the Scarlett Solo.
Record when nobody is around
Are people walking nearby? Is there construction work going on? You want to make sure that you are recording when noise outside your room is at a bare minimum or not at all. I live in a built-up estate where there are different bin collections from Monday-Wednesday which makes recording a nightmare. I also live near a primary school, so I have to record at a time when kids aren’t running back home.
Microphone Technique
This video from Aliso Creek is well worth the watch for different microphone techniques. Check it out.
Who to follow?
I want to dedicate the two main heroes I get my audio creation knowledge from. So please go and check them out if you are interested in improving your audio:
Mike Russel (Opens in a new window)
Podcastage (Opens in a new window)
Thanks for taking a read through this post. I hope you find some tips that will be helpful. Happy audio creation!